
Has quarantine life left you running out of ideas on how to entertain your little ones? Have you received a few boxes from ordering online? Well then, this DIY project is perfect for you and your new “coworkers”!
We have put together a tutorial for creating a cardboard box truck using materials found around the house. This DIY is a great activity for you and your kids to work on together. And once finished, it will provide endless fun.
For an added bonus, have a “drive-in” movie night!
Now, let’s roll on to the tutorial:
Materials and Configuration
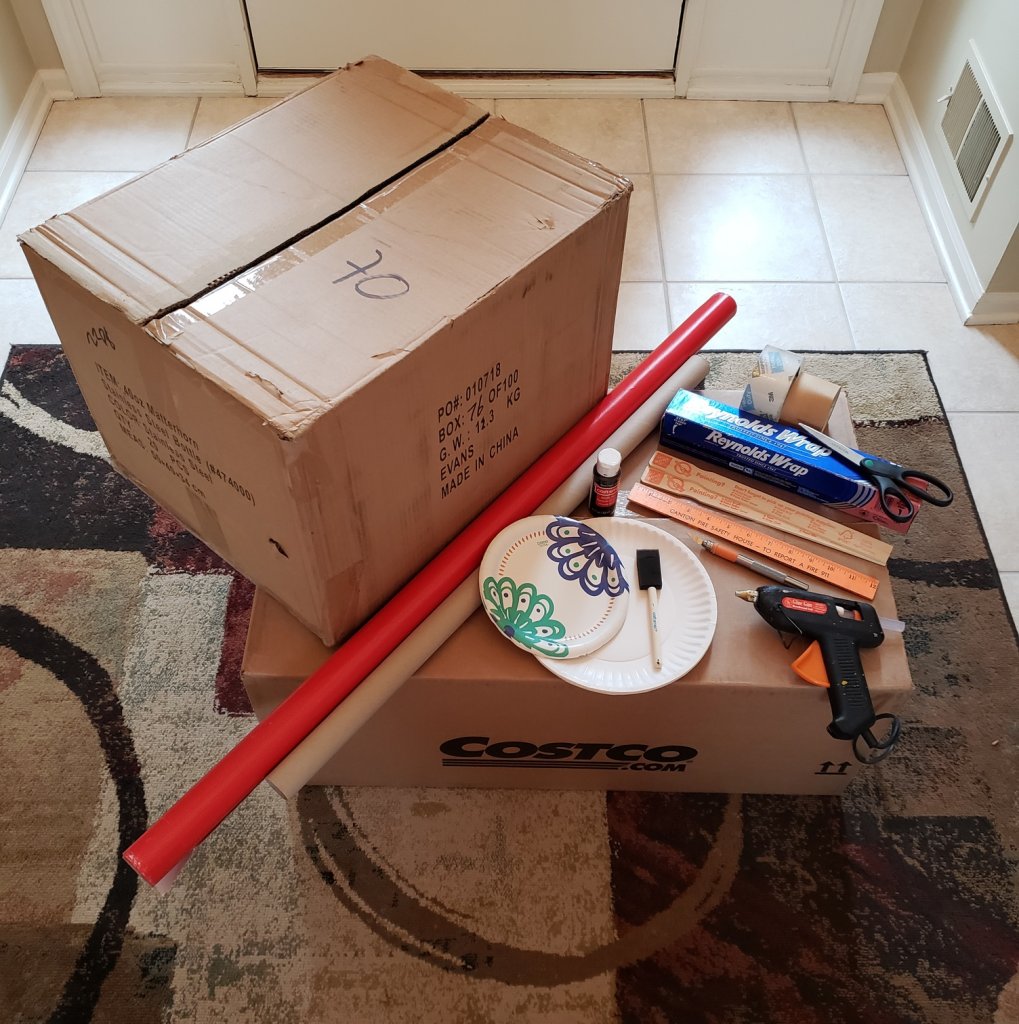
- Gather the following materials:
- 2 different sized cardboard boxes – one square-ish and one longer rectangular
- (The rectangular box should be long enough for a child to sit in with excess room above the head when positioned vertically.)
- 2 large paper plates
- 2 small paper plates
- 2 paint stirs
- Pencil, Marker
- Ruler
- Utility knife/Box cutter
- Scissors
- Hot glue gun
- Invisible tape
- Packaging tape
- Aluminum foil
- Wrapping paper
- Craft paint (black)
- Foam paint brush
- (Optional) Wrapping paper tube
- 2 different sized cardboard boxes – one square-ish and one longer rectangular
- (Optional) If you plan to paint the boxes, use a hair dryer to remove any labels and/or access tape on the boxes.
- You may want to swap out or tape over packaging tape with tape you can paint on.
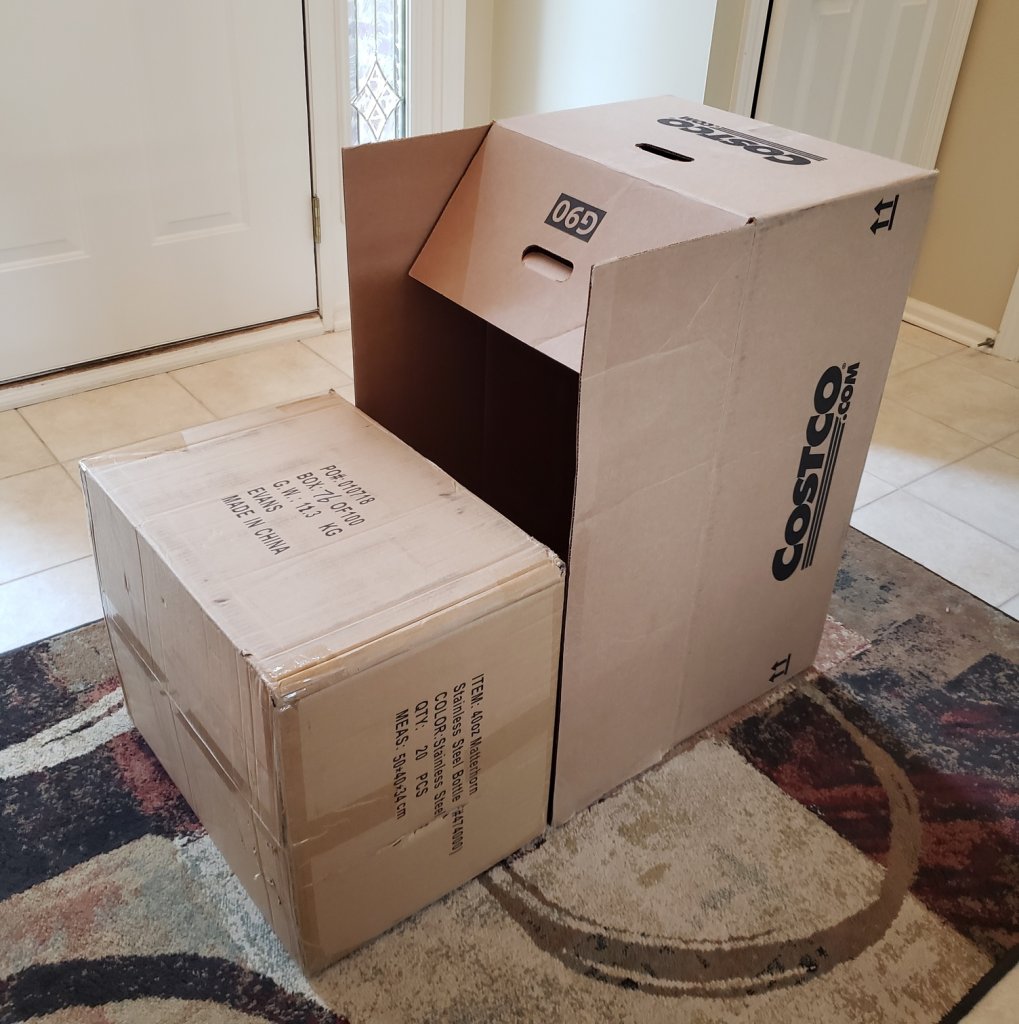
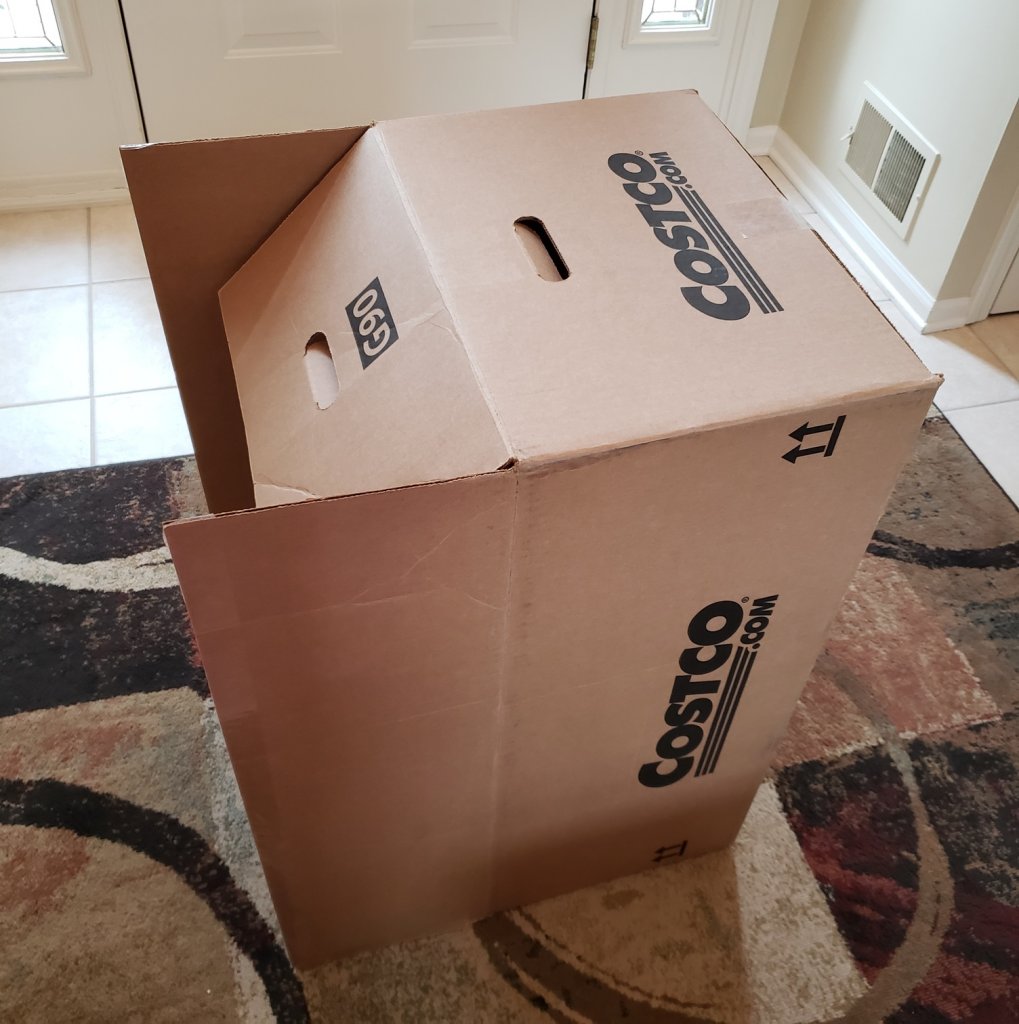
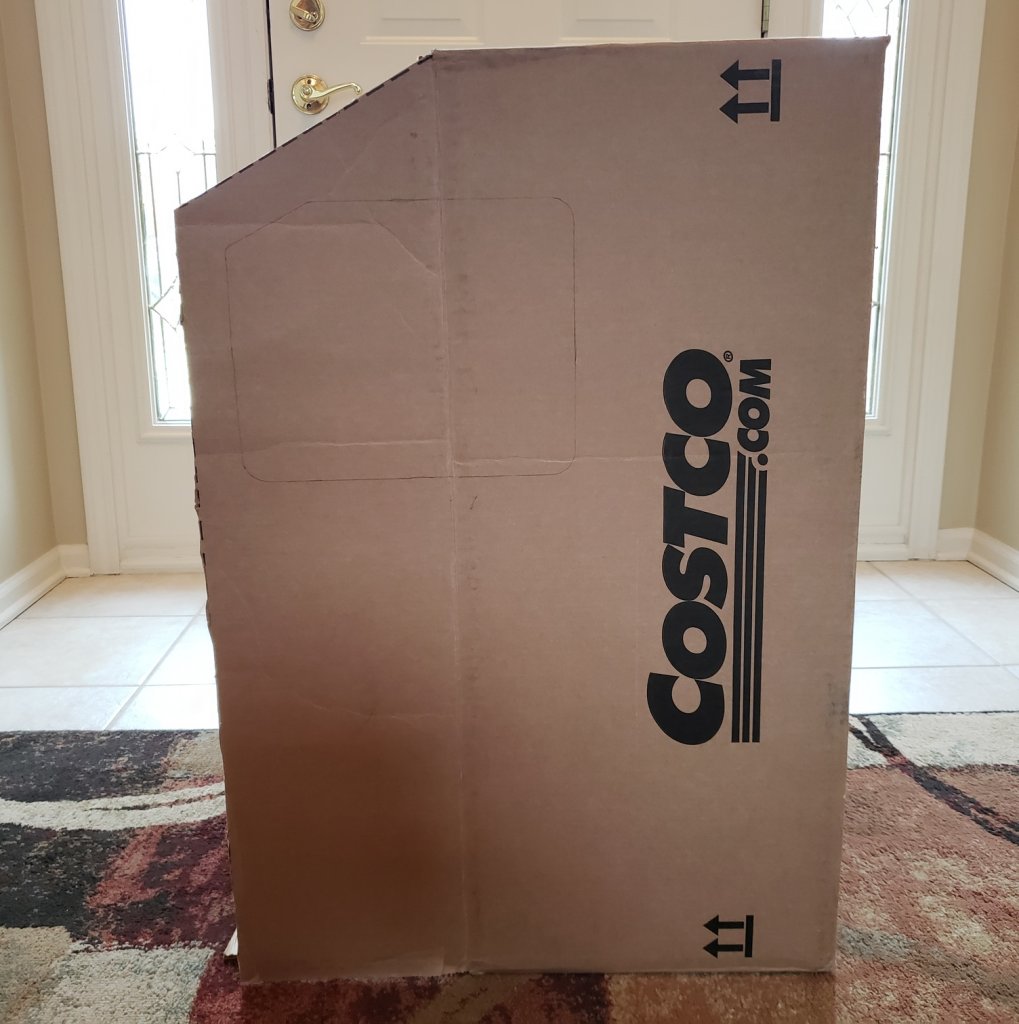
- Configure the 2 cardboard boxes to form the shape of the truck to get an idea of how it will look.
- The box sides with the flaps will face one another.
- Keep all flaps open on the larger box and just the bottom flap of the smaller box.
- The bottom flaps will rest on top of one another.
- Mark the bottom flaps.
- The bottom flaps will rest on top of one another.
Let’s work on the smaller box first…
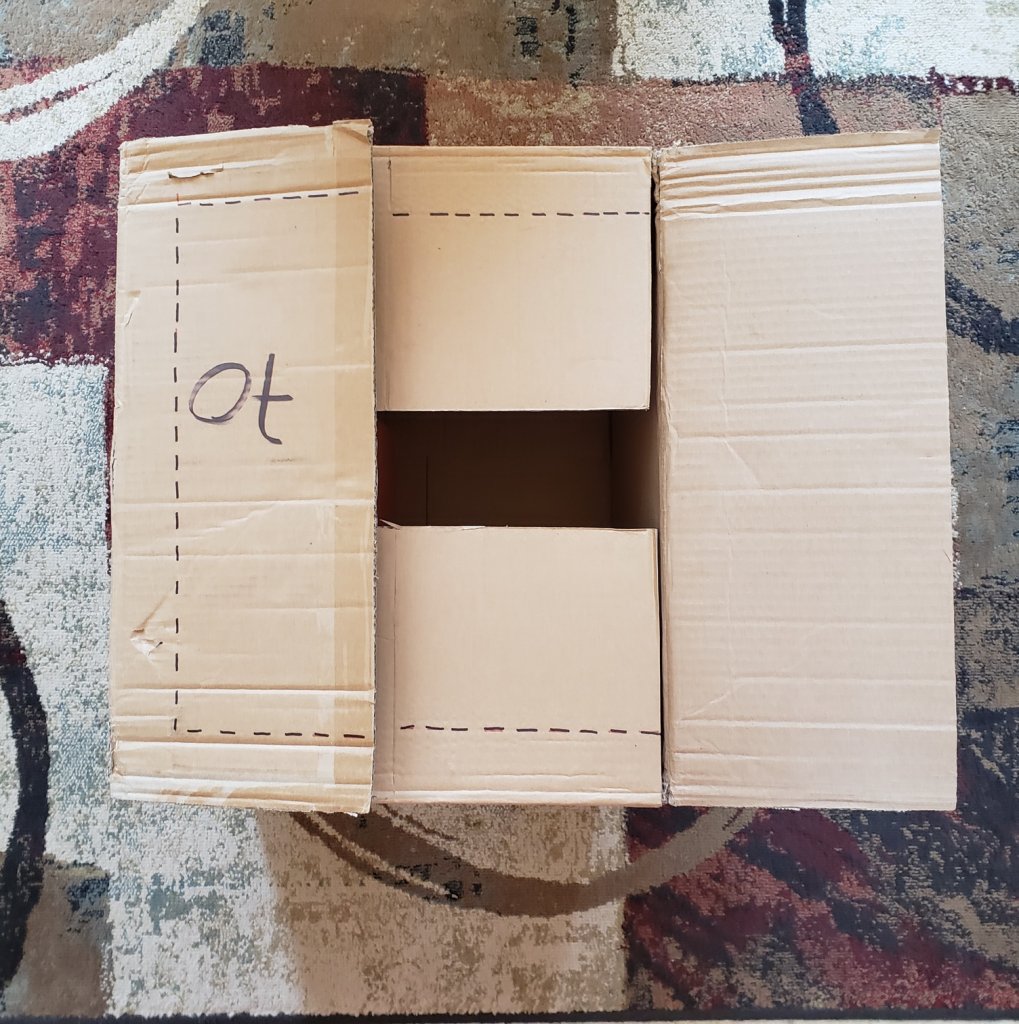
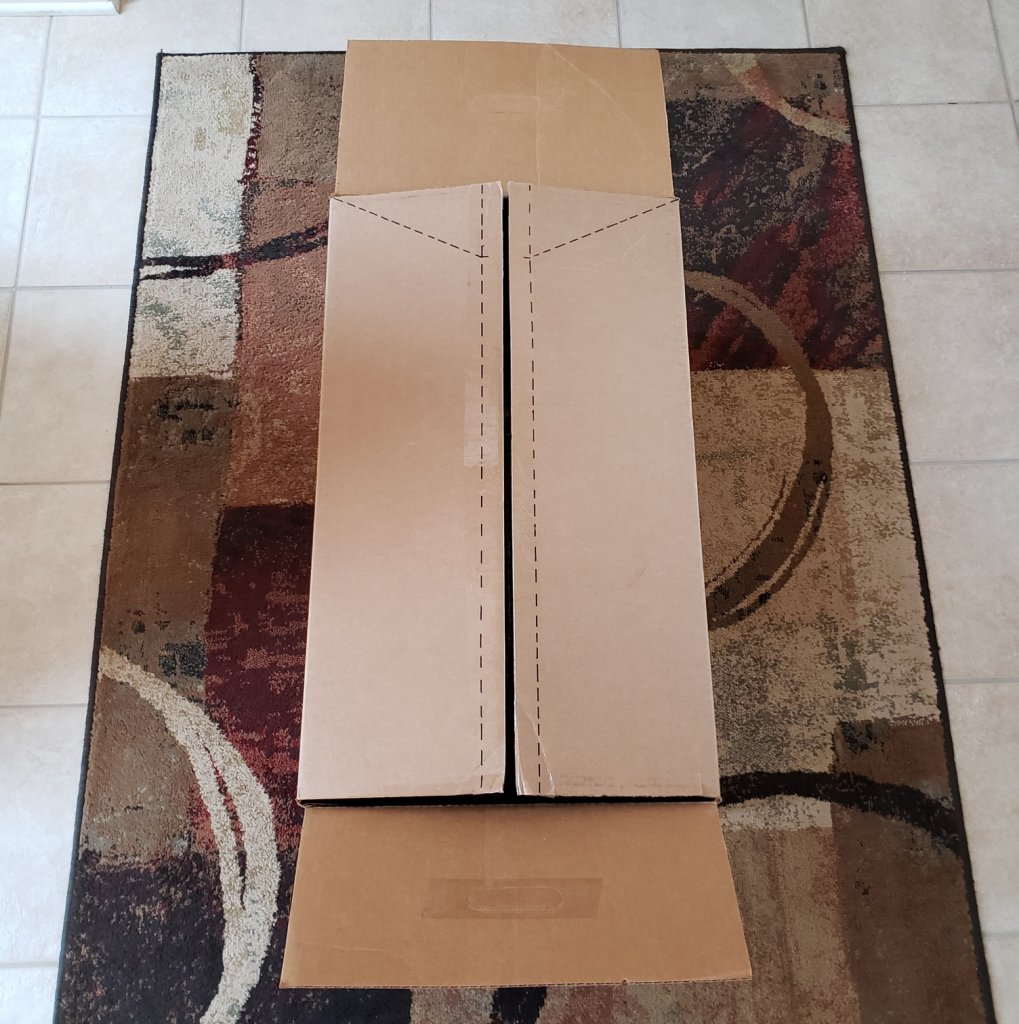
- Lay smaller box on the ground with flaps on top keeping just the marked bottom flap open.
- On the 2 side flaps, draw a parallel line 2” from box edge.
- On the top flap, draw a 2” border along the 3 outer edges.
- Cut along the lines.
- BE SURE TO SAVE THE EXCESS CARDBOARD!
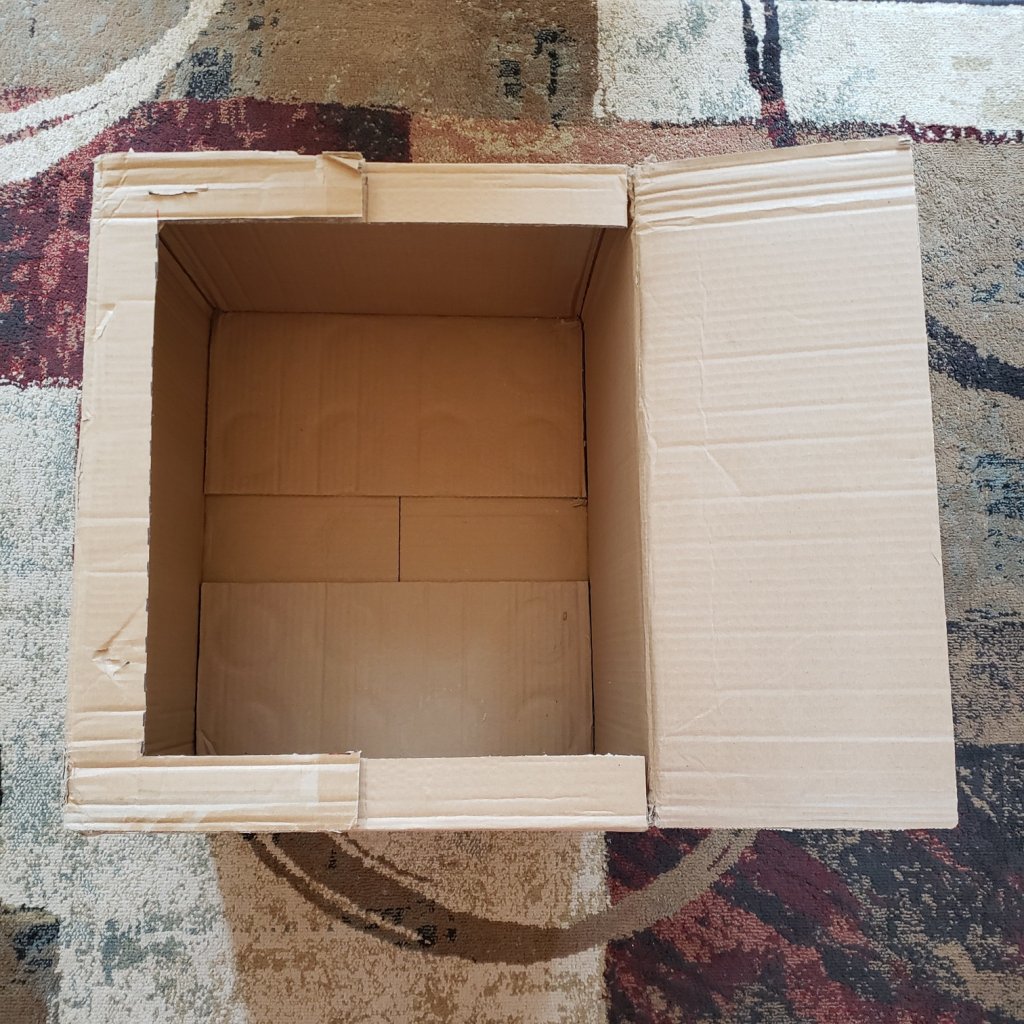
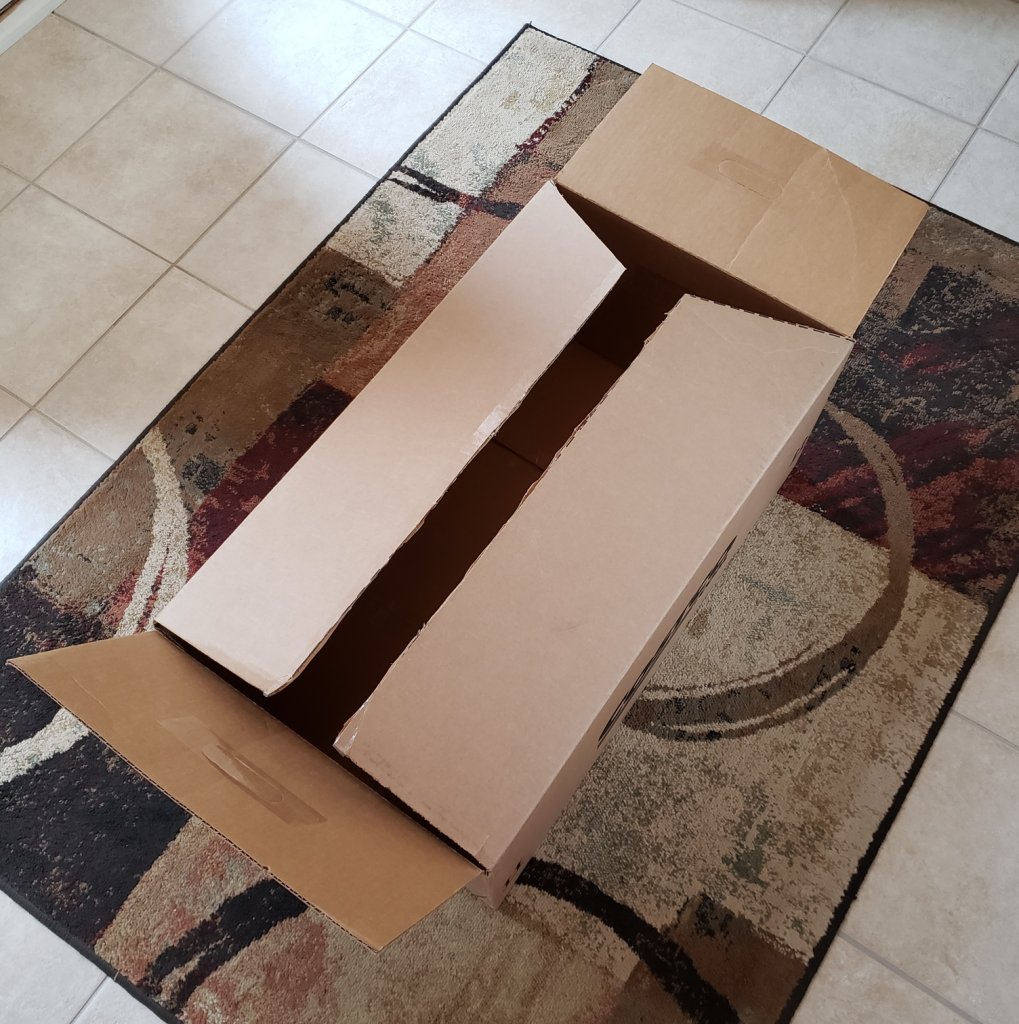
- Once flaps are cut, “close” the flaps.
- You should essentially have a 3-sided frame (with bottom flap still open and uncut).
- Glue the remaining top flap onto the 2 remaining side flaps.
- Lay the box on its side with bottom flap open and laying on the ground.
- You should have what looks like an open oven.
- (Optional but Recommended) With tape, reinforce any “weak” areas (i.e. 2” frame, bottom flap crease, holes/damage, etc.).
Now, onto the larger box…
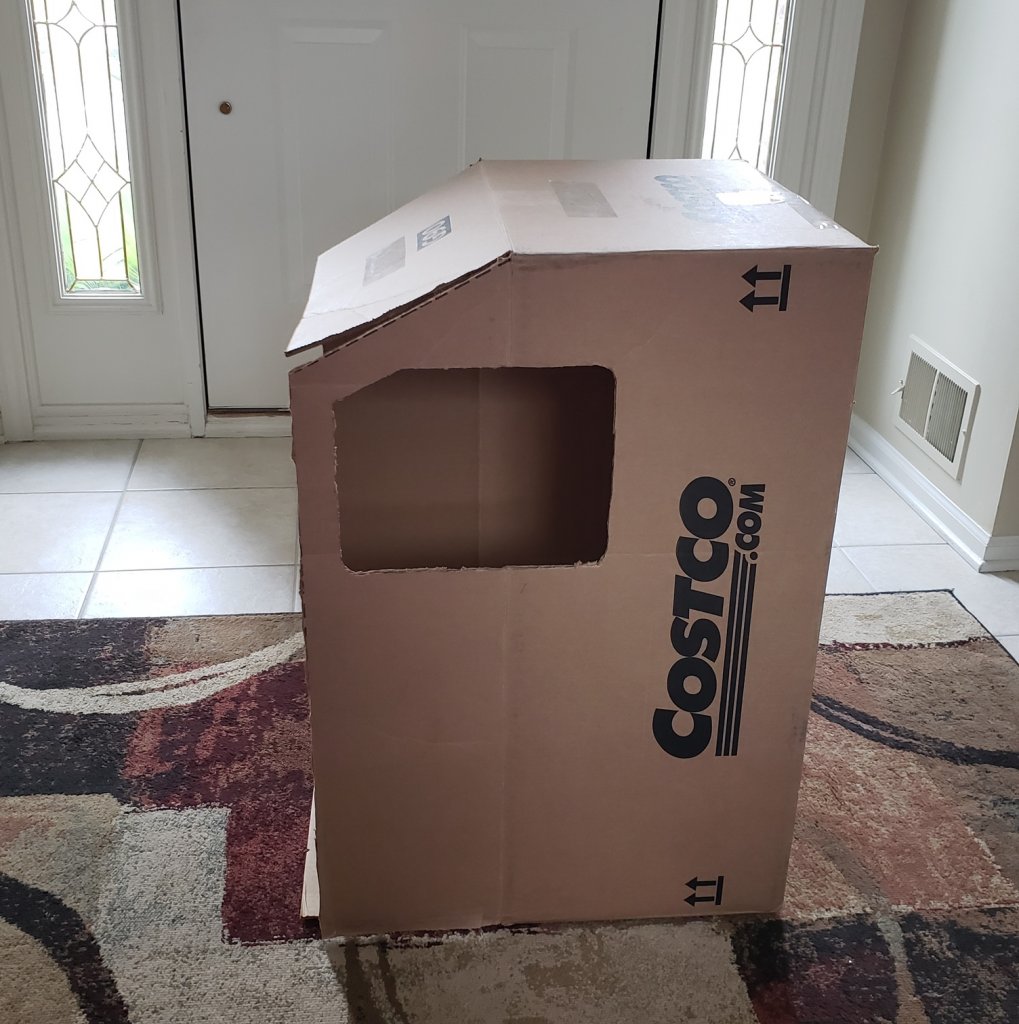
- With the box still laying in its “finished position” (all flaps open with the side with the marked flap on the ground), decide on an angle for the top flap to create the wind deflector or roof fairing.
- On the inside of one side flap, mark where the bottom corner of the top flap lines up.
- Measure the length from the top of the side flap to the mark and from the outer edge of the side flap to the mark.
- Lay box on ground with flaps on top (keeping the marked bottom flap and top flap open).
- Use the dimensions you just measured to create the mark on the outside of the 2 side flaps
- Draw a diagonal line from the mark to the top outer corner of the flap.
- Draw a parallel line from the mark to the bottom edge of the flap.
- Cut along the lines.
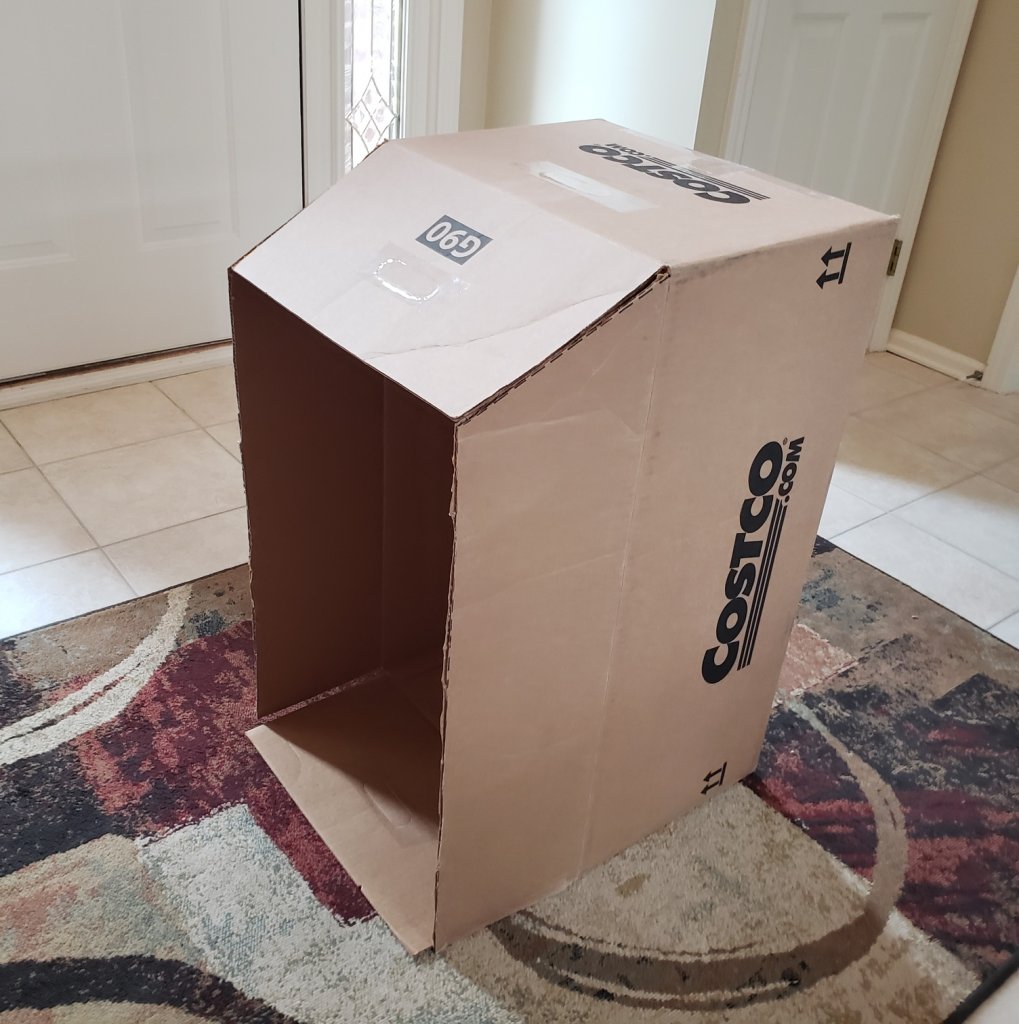
- Put box back into its “finished position” (all flaps open with the side with the marked flap on the ground).
- Now you can see that the top flap lines up with the side flaps.
- Draw a “window” on both sides of the truck.
- It is best to draw the window at least 1&½” from the edges of the side flap.
- Cut out the windows.
- If the box has holes for carrying, tape them closed (preferably on both the inside and outside of the box).
- Tape the top flap to side flaps.
- (Optional but Recommended) With tape, reinforce any “weak” areas (i.e. windows, bottom flap crease, any holes or damage, etc.).
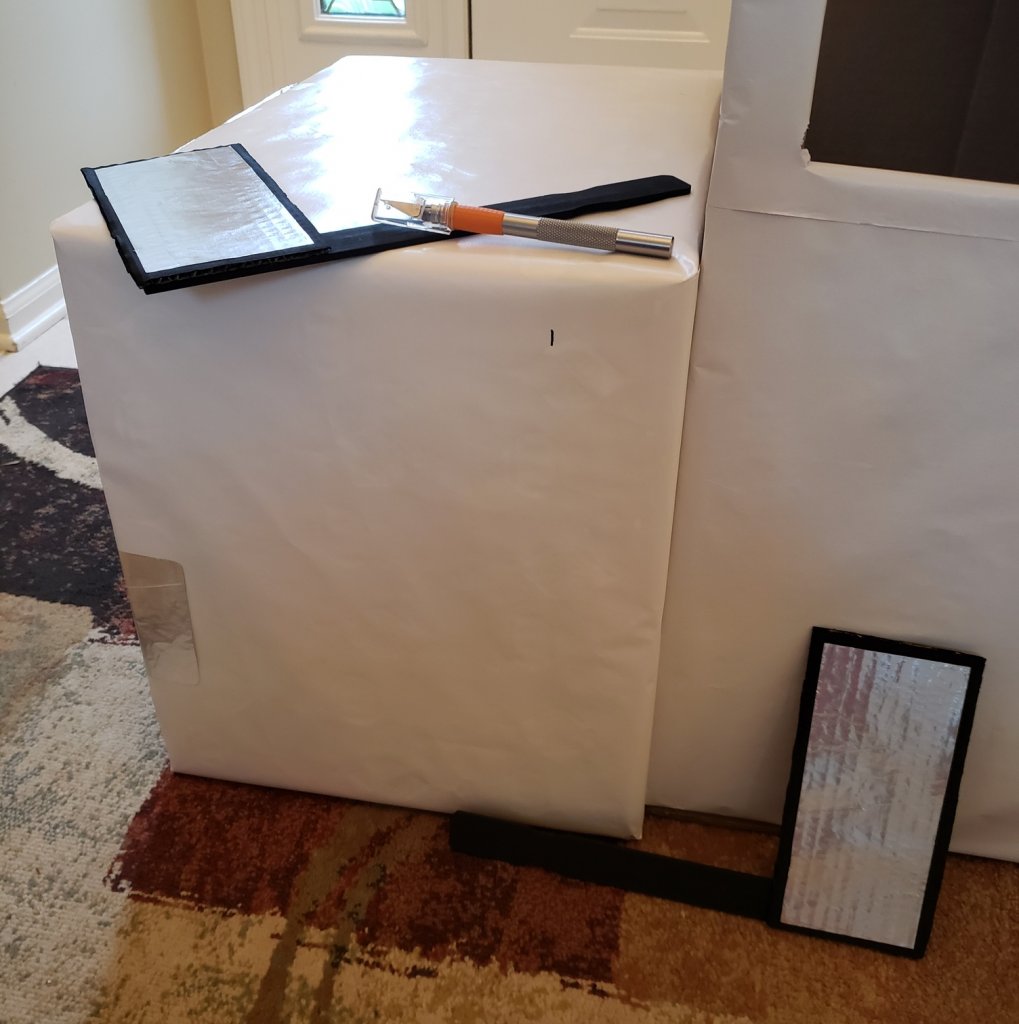
Let’s make some accessories…
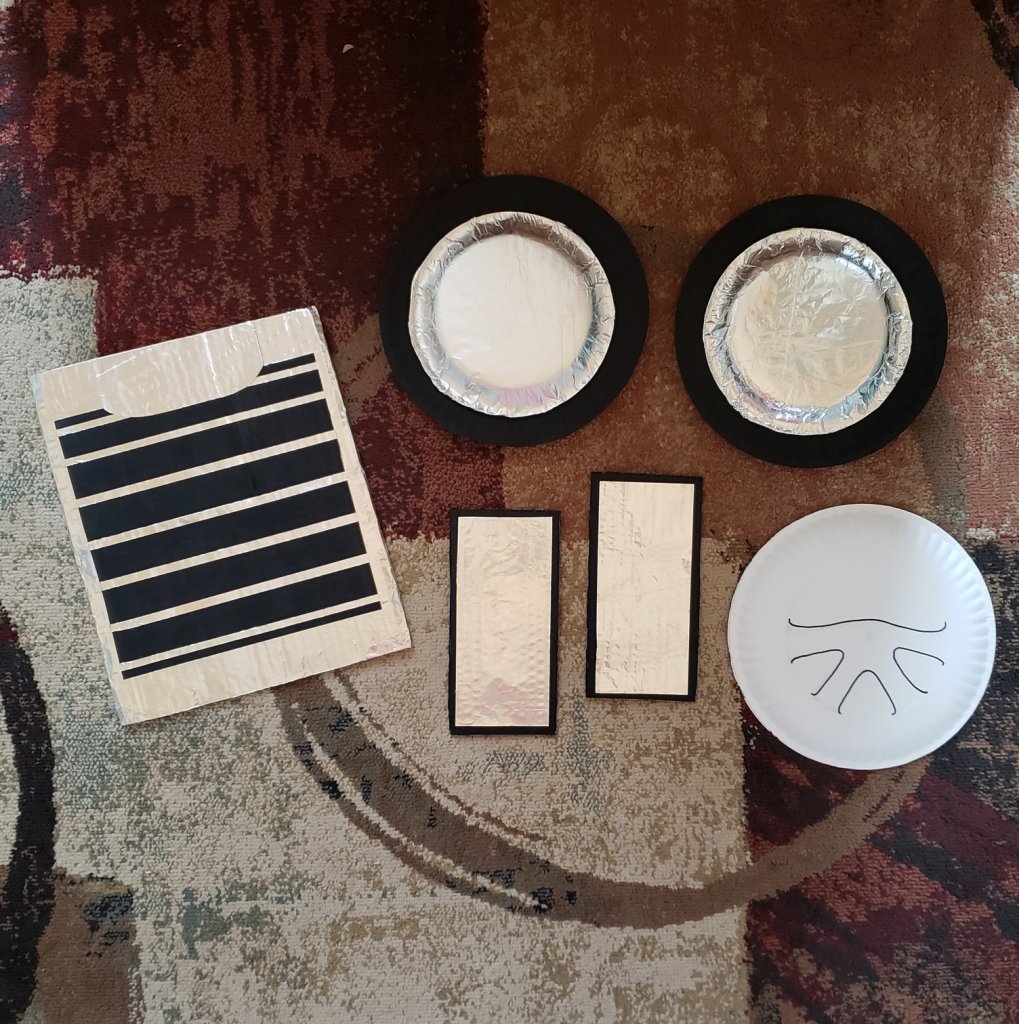
Cutting the Accessories
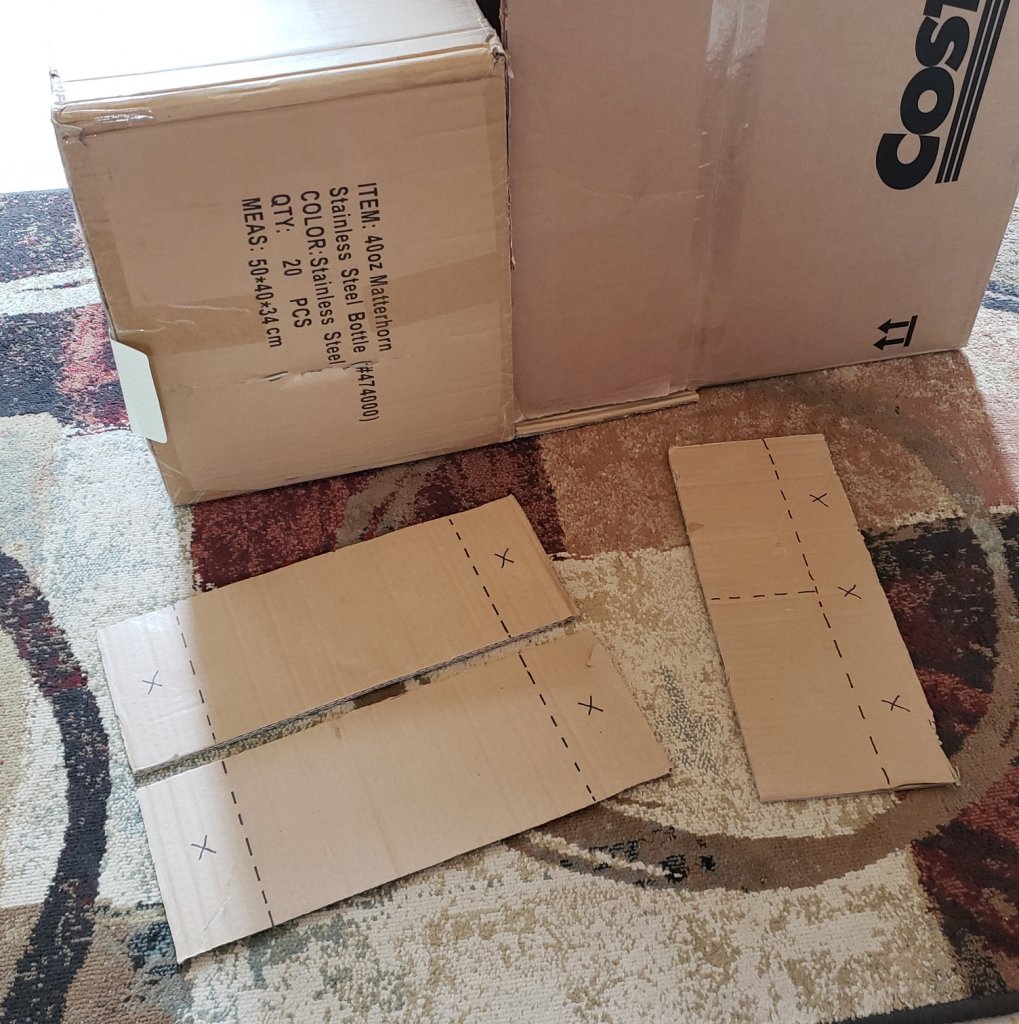
- Radiator Grill – Using the excess
cardboard, mark and cut a rectangle to the desired dimensions.
- In this case, we taped 2 pieces of cardboard together to create the desired size.
- Side Mirrors – Using the excess cardboard, mark and cut out 2 rectangles to the desired dimensions.
Painting the Accessories
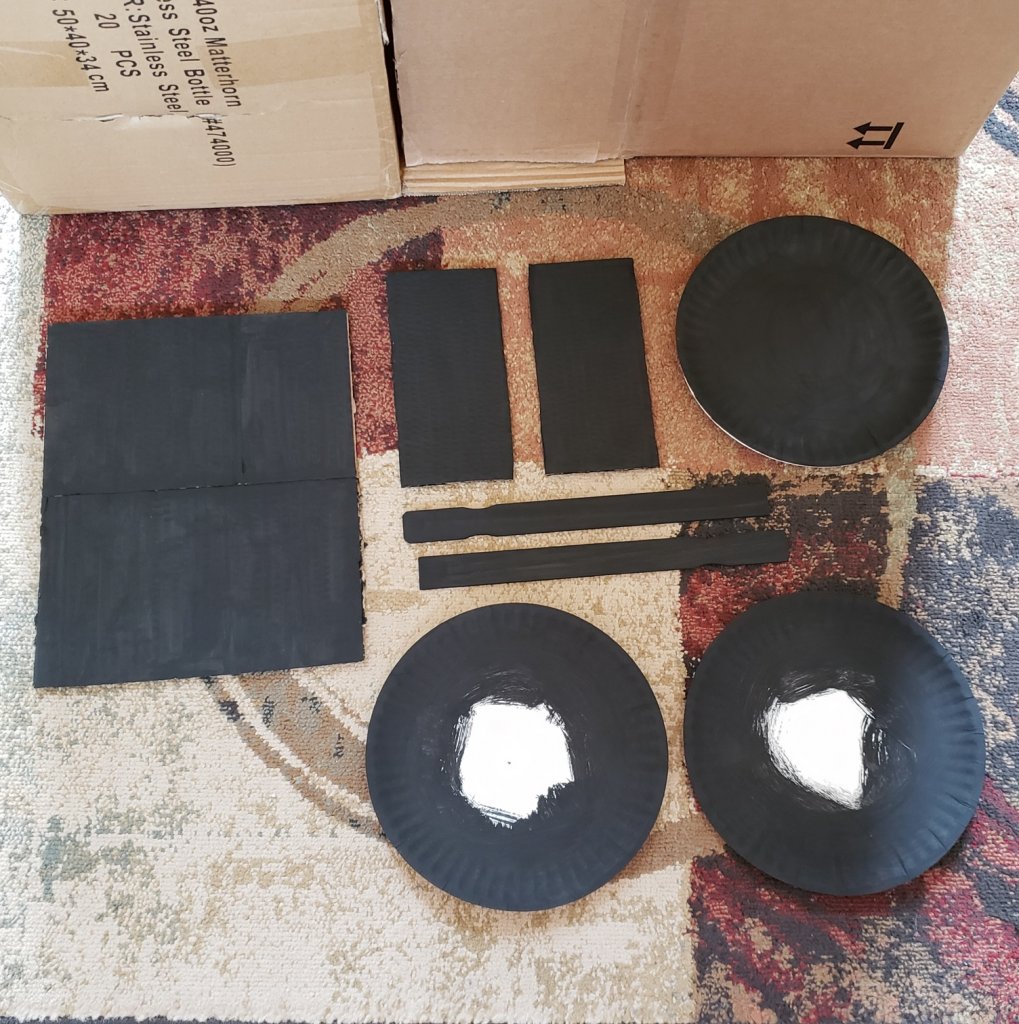
Paint the radiator grill, 2 mirrors, 2 paint stirs, and 3 large paper plates:
- Radiator grill – front only
- 2 Mirrors – front, back, sides
- 2 Paint stirs – front, back, sides
- 2 Large paper plates – front outer edge only
- 1 Large paper plate – front only (will have to paint the back later)
Creating the Acessories
Wheels
- Cover the backs of the 2 small paper plates with aluminum foil.
- It is best to use enough foil to wrap around the edge.
- Glue one aluminum-covered small plastic plate to the middle of each edge-painted large paper plates.
- Set the 2 finished wheels aside.
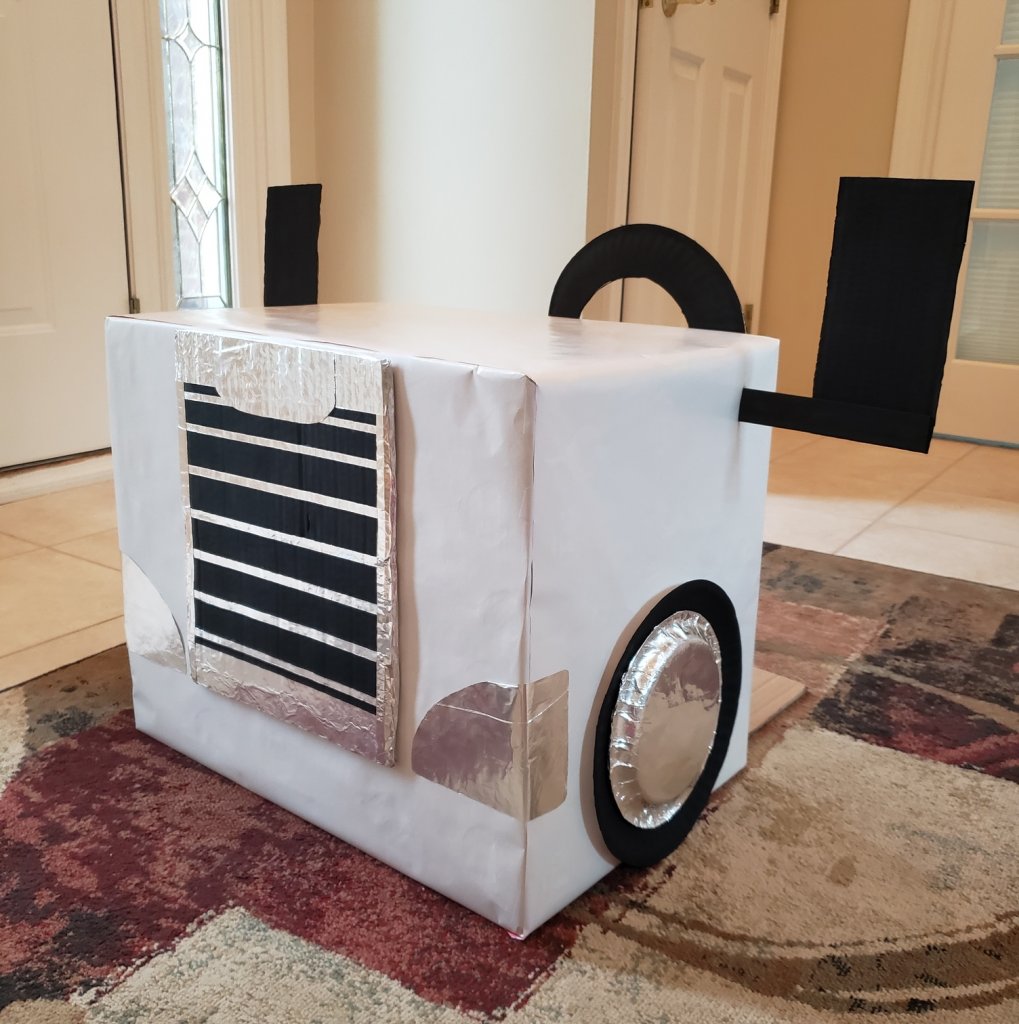
Radiator Grill
- Cut thin strips of aluminum foil to create the horizontal lines of the radiator grill.
- Cut 4 thicker strips of aluminum foil to create the frame of the radiator grill.
- With painted side facing up, glue the thin aluminum strips horizontally to the cardboard grill.
- Glue the thicker aluminum strips along the edges – be sure to leave some excess foil to wrap around the sides of cardboard grill.
- Set finished radiator grill aside.
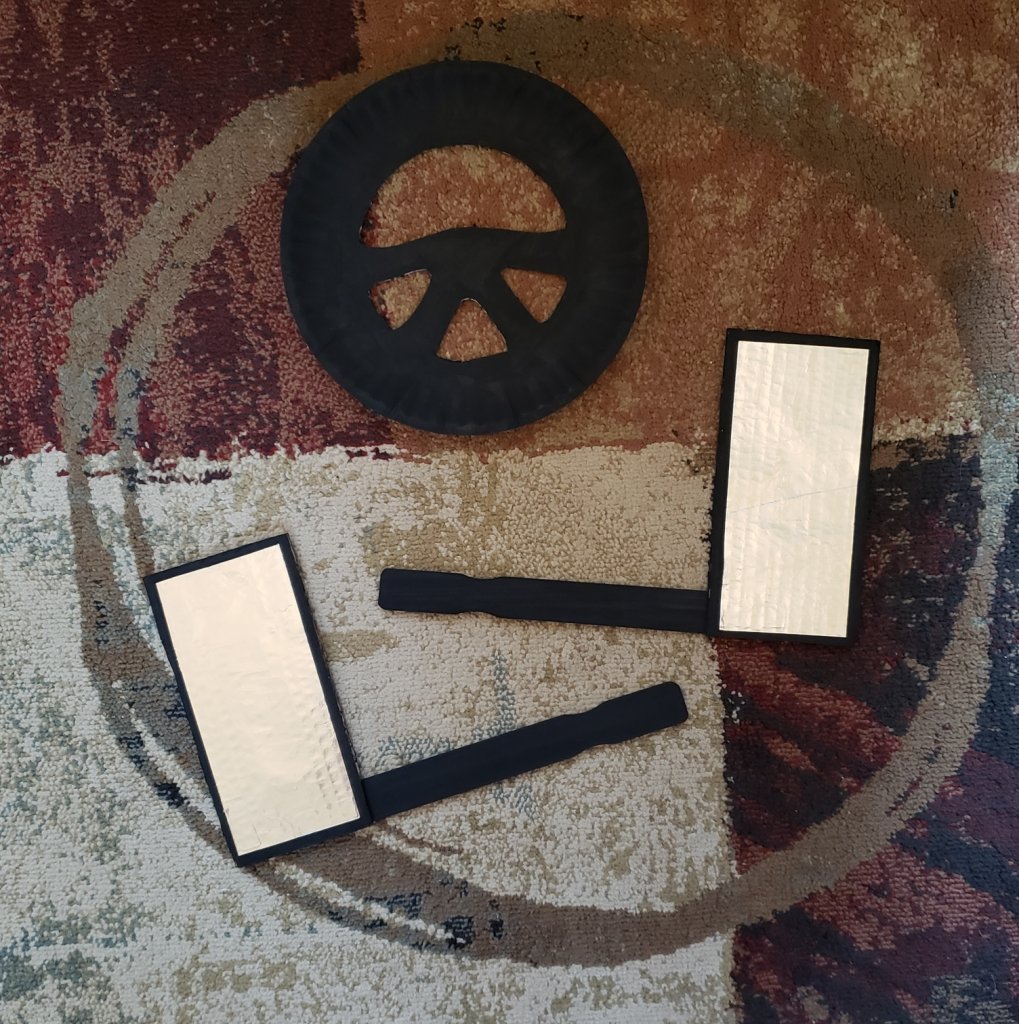
Side Mirrors
- Cut 2 “mirrors” out of aluminum foil – be sure to cut rectangles ½” shorter and ½” narrower than the painted cardboard mirror.
- Glue one aluminum rectangle to the center of each painted carboard mirror leaving a ¼” border all around.
- Flip mirrors over with aluminum side facing down.
- Glue one painted paint stir to the bottom edge of each mirror.
- Set finished side mirrors aside.
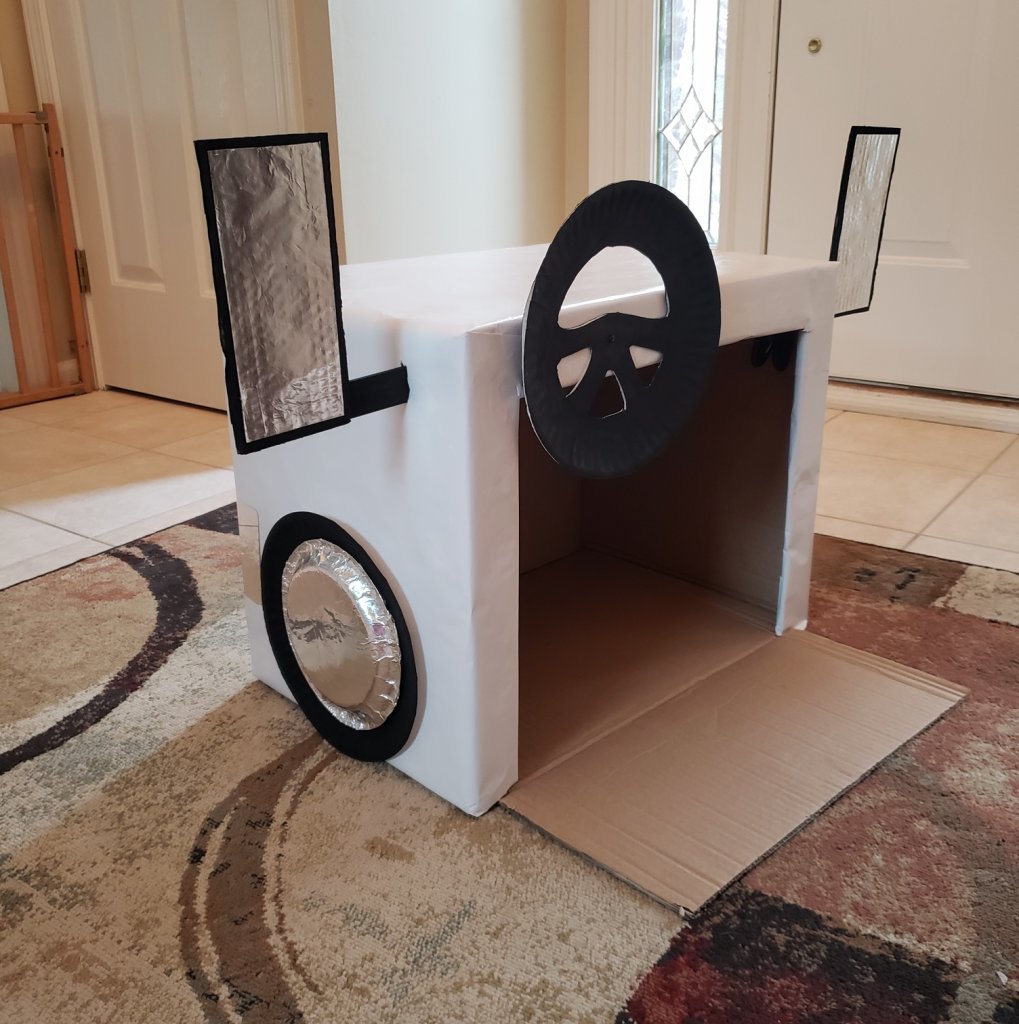
Steering Wheel
- On the back of the remaining painted large paper plate, draw the outline of the steering wheel.
- Cut along the lines.
- Paint the back side of the steering wheel.
- Set finished steering wheel aside.
Headlights
- Draw and cut out 2 “headlights” in aluminum foil.
- Set finished headlights aside.
Back to the boxes…
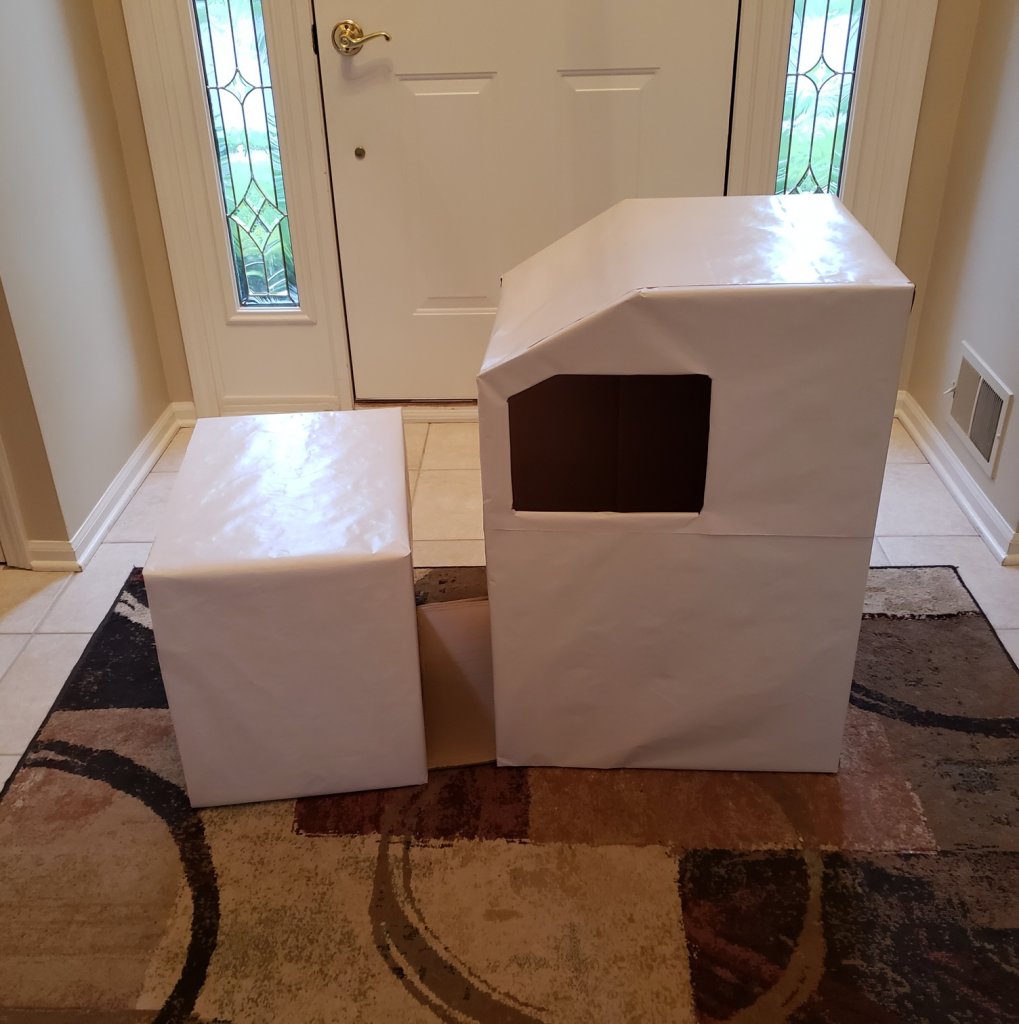

- Wrap the 2 cardboard boxes individually in wrapping paper.
- (Option 2) Paint the 2 cardboard boxes.
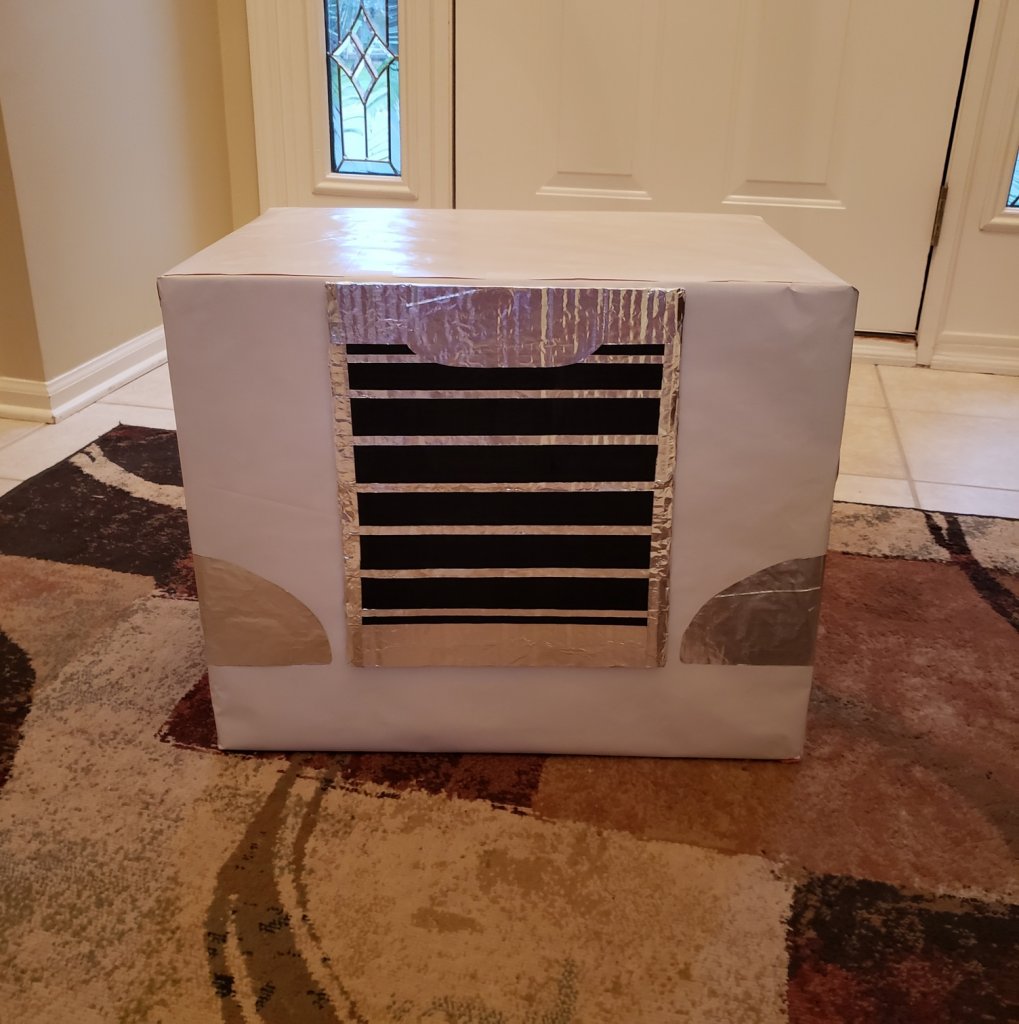
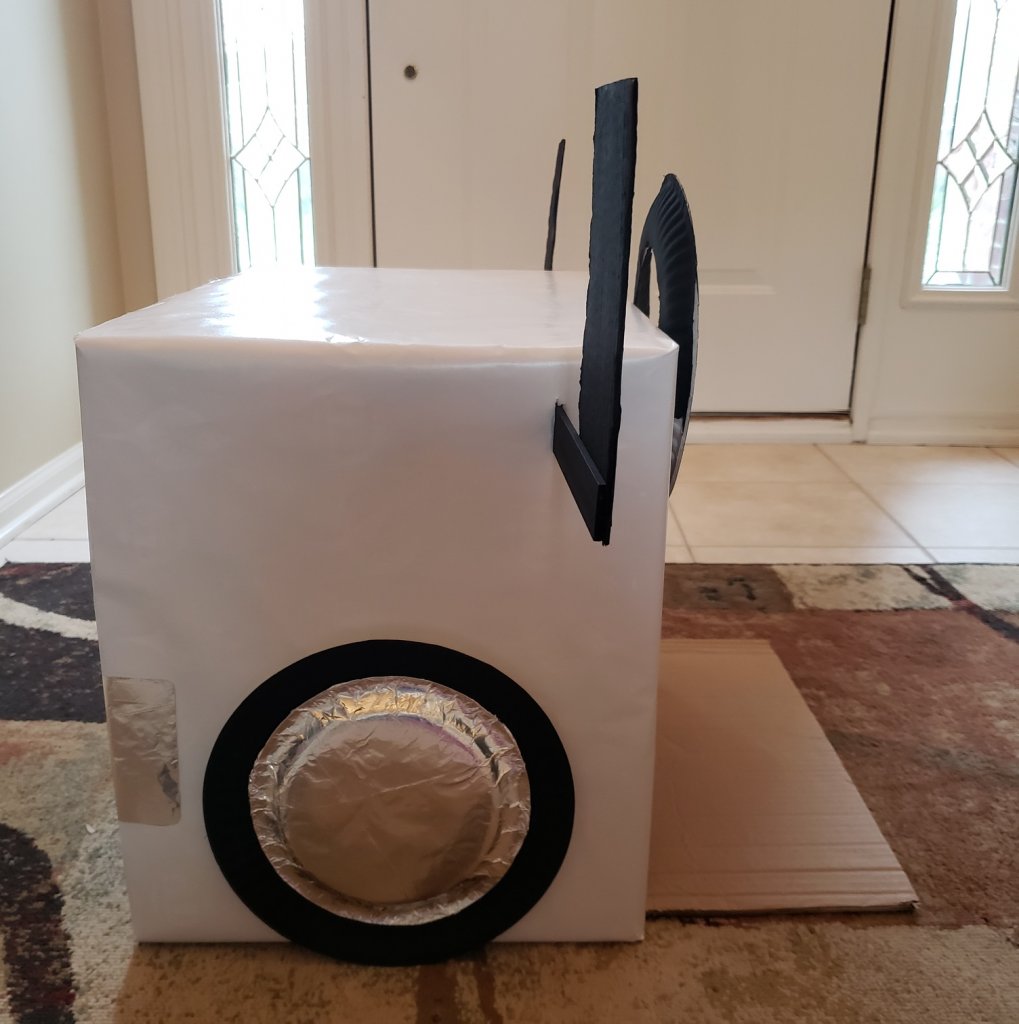
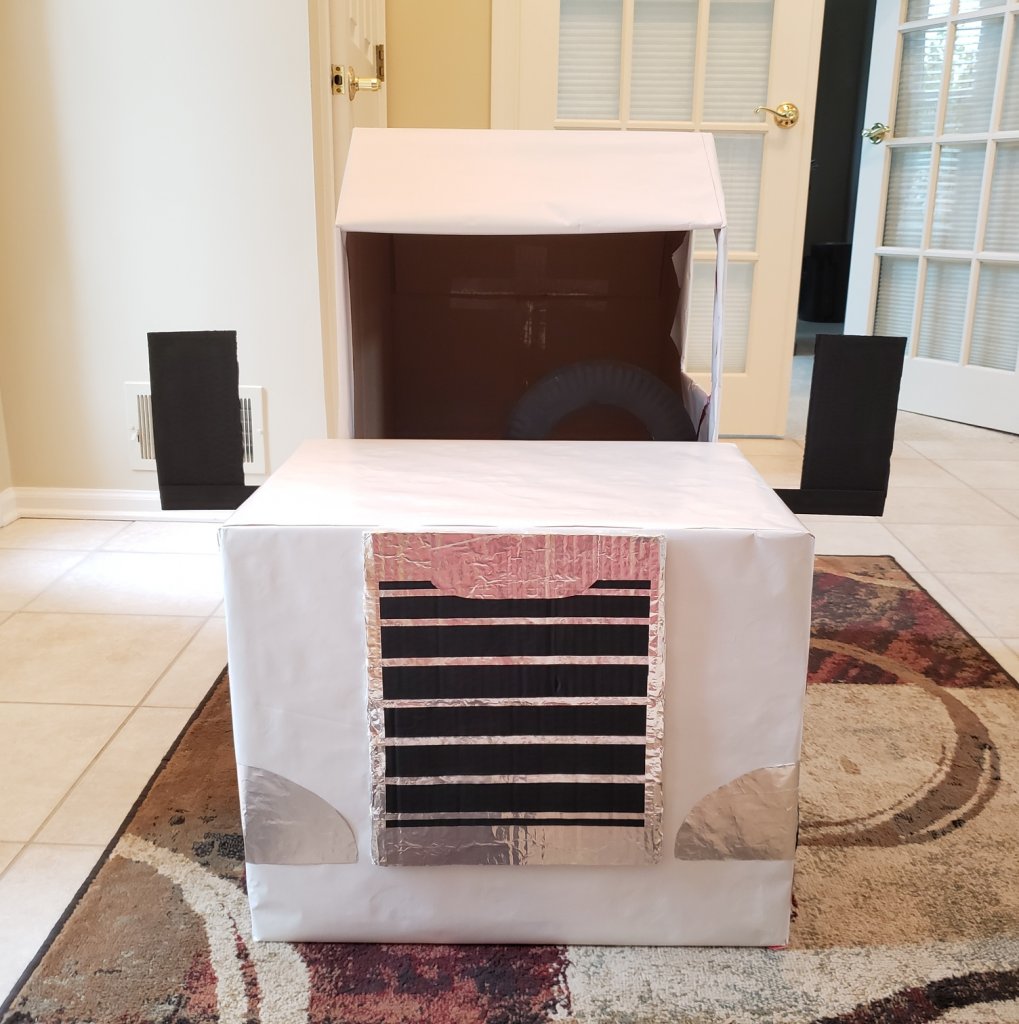
- Glue the radiator grill to the front of the smaller box – be sure to align the TOP edges.
- Glue the headlights about an inch from the radiator grill – be sure to align the BOTTOM edges.
- Headlights should wrap around the sides of the box.
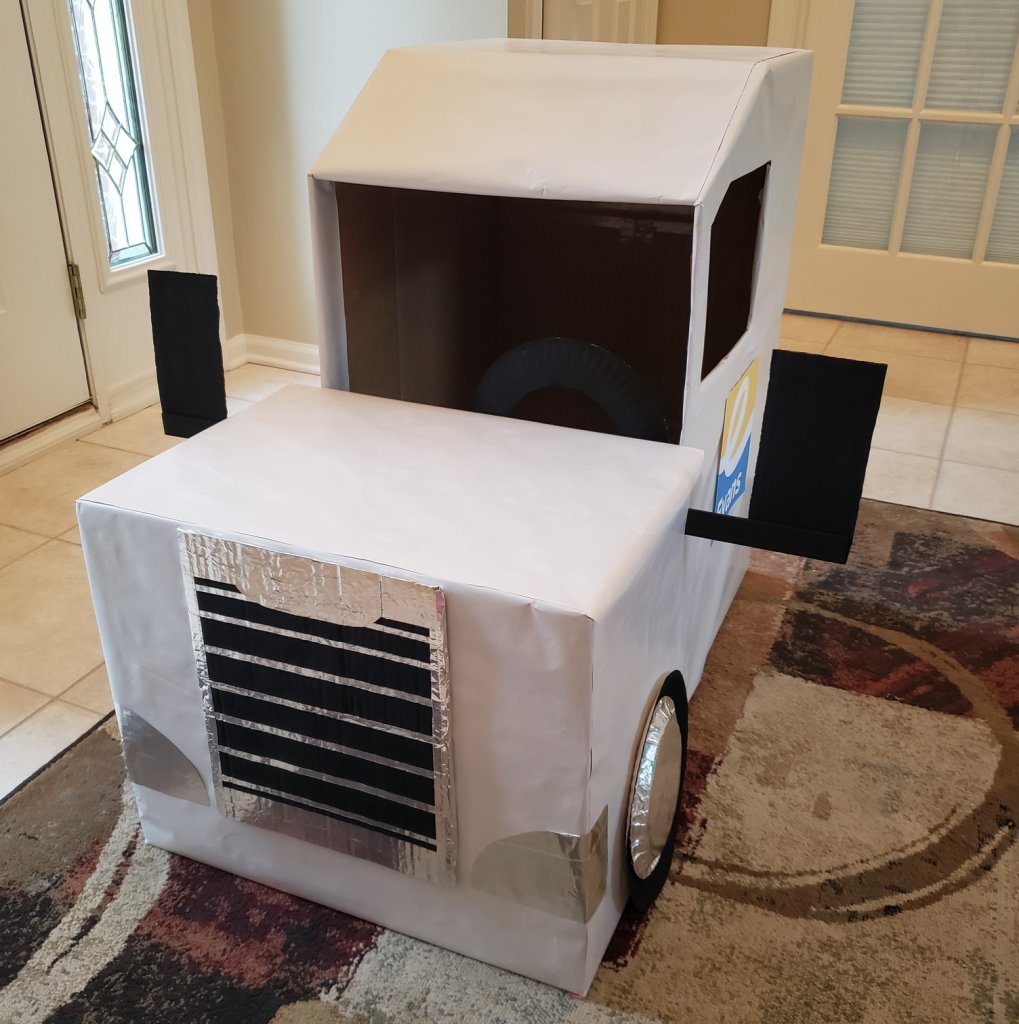
- On the side of the smaller box, decide on where the side mirrors should go.
- Mark and cut a vertical slit just big enough to push the paint stir through.
- Push paint stir in as far as desired.
- Repeat steps 3-5 for other side.
- Glue one wheel to each of the sides of the smaller box – be sure to align the bottom edges.
- Glue the steering wheel to the top of the frame of the inner side of the smaller box.
- (Optional) Attach the steering wheel with a brad to allow the steering wheel to spin.
You’ve reached your final destination…
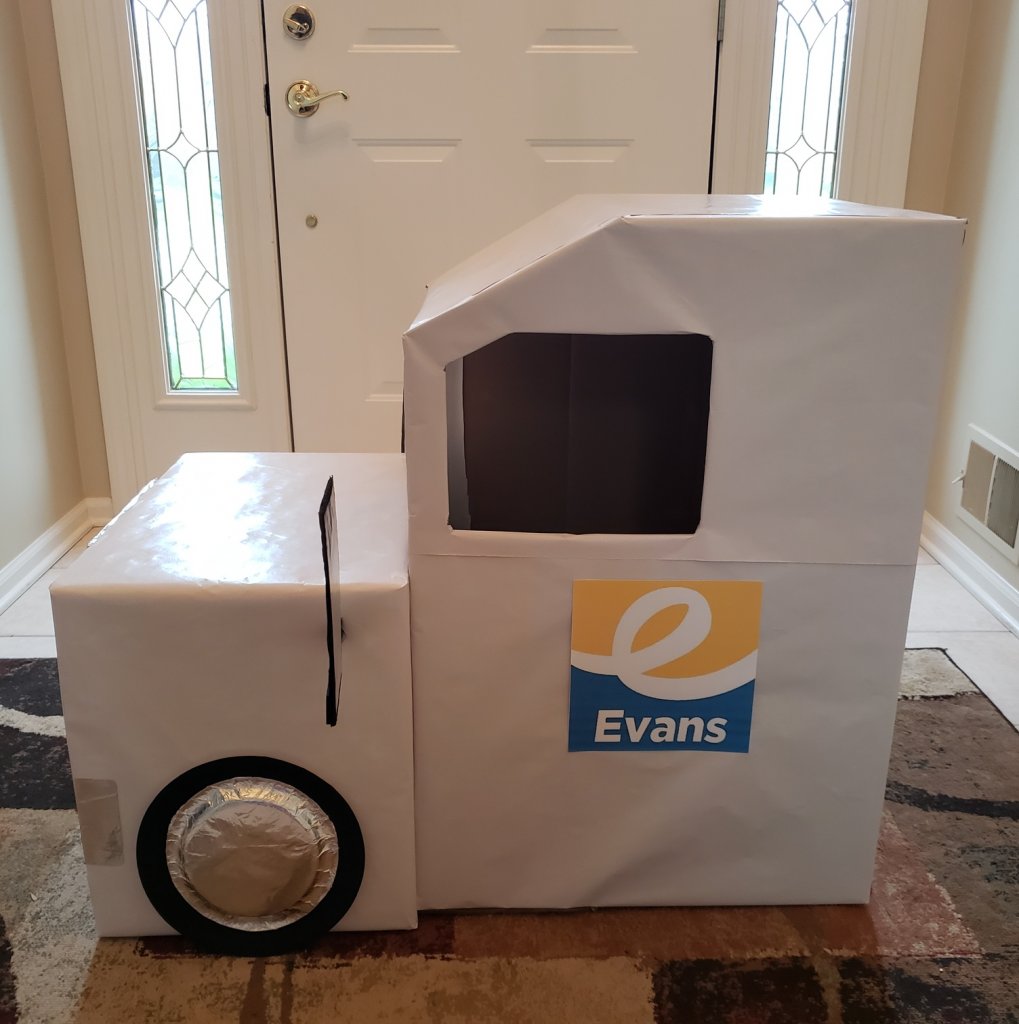
Push the 2 boxes back together and add automotive decals or decorate the truck however you wish!
(In this case, we printed an Evans decal off the computer and glued it to the side of the truck.)
Beep! Beep!

Now, have your little truck driver jump in and drive wherever their imagination takes them.
For more fun, create a “drive-in” movie night. Make some popcorn, grab a drink, park the truck, and watch a movie.
We would love to see your DIY cardboard truck or car! Feel free to share with us by emailing marketing@evansdist.com or tagging us on Facebook, Instagram, Twitter and/or LinkedIn!